 Zum Inhalt springen


When your Infiniti displays the dreaded check engine light, it indicates a potential issue that needs attention. Modern vehicles, including Infiniti models, are equipped with onboard diagnostic systems that can help identify these problems.
Using an OBD2 scanner, you can read and erase fault codes, saving time and potentially expensive trips to the mechanic. This guide will walk you through the process of using an OBD2 scanner to manage fault codes in your Infiniti. Stay ahead of car issues - Order your ANCLE scanner today!
What is an OBD2 Scanner
An OBD2 scanner is a diagnostic tool that connects to your vehicle's OBD2 port, typically located under the dashboard.
It communicates with your car's computer system to retrieve diagnostic trouble codes and other information.
These codes help identify specific issues with your vehicle, from engine problems to sensor malfunctions.
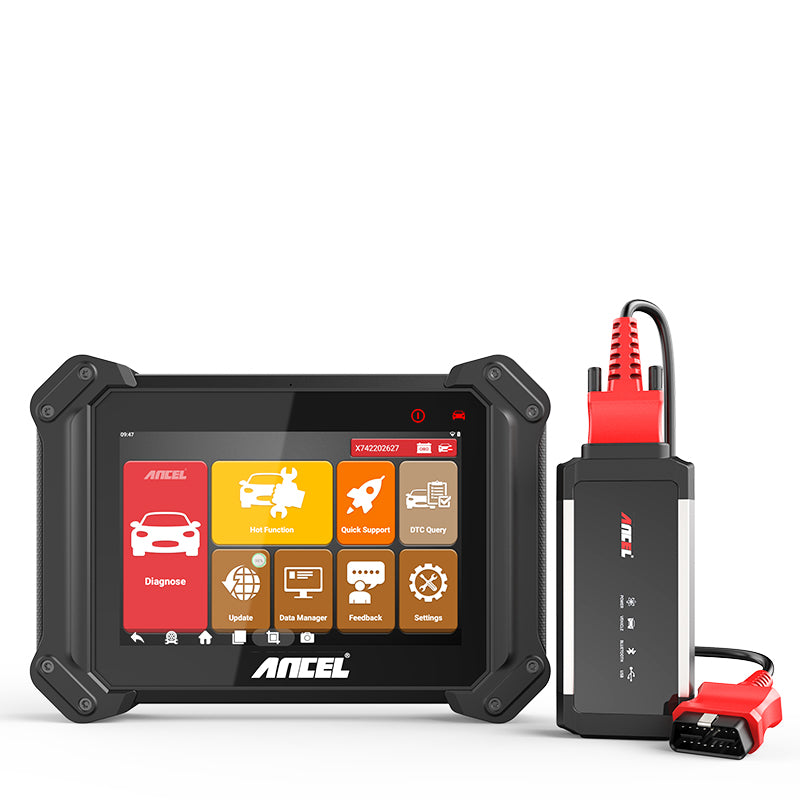
ANCEL V6 Pro have become essential tools for car owners and mechanics alike, offering a convenient and efficient way to diagnose and resolve a wide range of automotive issues.
There are various types of OBD-II scanners, ranging from basic code readers to advanced diagnostic tools. Basic code readers are affordable and user-friendly, providing simple DTC retrieval and code clearing.
These are ideal for car owners who need to perform basic diagnostics and reset fault codes.
Advanced scanners, on the other hand, offer more comprehensive diagnostics ANCEL V6 pro, including live data streaming, freeze frame data, and manufacturer-specific codes.
Related Reading: Which is the Best Obd2 Scanner
Steps to Read Infiniti Fault Codes
Step 1: Locate the OBD2 Port
The first step in reading fault codes is to locate the OBD2 port in your Infiniti. This port is usually found under the dashboard, near the driver's seat.
It may have a cover that needs to be removed. Refer to your vehicle's manual if you have trouble locating it. The OBD2 port is a standardized connector, ensuring compatibility with all OBD-II compliant vehicles.
Its location is designed for easy access, allowing you to quickly connect your scanner and begin diagnostics without needing to disassemble parts of the vehicle.
Step 2: Connect the OBD2 Scanner
Once you have located the OBD-II port, connect your OBD2 scanner to it. Ensure the connection is secure, and turn on the ignition without starting the engine.
This powers the vehicle's systems and allows the scanner to communicate with the onboard computer.
The connection process is straightforward, but it is essential to ensure a secure and stable connection to avoid interruptions during the diagnostic process.
Step 3: Retrieve Fault Codes
Follow the instructions on your OBD-II scanner to retrieve fault codes.
This typically involves navigating through the scanner's menu to the "Read Codes" or "Scan" function.
The scanner will then communicate with your vehicle's computer and display any stored DTCs.
Step 4: Interpret the Codes
The OBD2 scanner will display fault codes in a format such as P0123. These codes can be looked up in the scanner's manual or an online database to determine their meaning.
Each code corresponds to a specific issue, such as a malfunctioning sensor or a misfire. Interpreting the codes accurately is essential for effective diagnosis and repair.
$439.99
Common Infiniti Fault Codes
Understanding some common Infiniti fault codes can help you quickly identify issues and determine the best course of action for repair.
P0101: Mass Air Flow (MAF) Sensor Circuit
This code indicates that the MAF sensor is not functioning within the expected range, possibly due to a dirty sensor, air leaks, or a faulty sensor.
P0300: Random/Multiple Cylinder Misfire Detected
This code suggests that multiple cylinders are misfiring randomly, which could be caused by faulty spark plugs, ignition coils, or fuel injectors.
P0420: Catalyst System Efficiency Below Threshold (Bank 1)
This code indicates that the catalytic converter on Bank 1 is not operating efficiently, possibly due to a failing catalytic converter or an issue with the oxygen sensors.
P0430: Catalyst System Efficiency Below Threshold (Bank 2)
Similar to P0420, this code signifies that the catalytic converter on Bank 2 is not functioning efficiently, which may require replacement of the catalytic converter or oxygen sensors.
P0500: Vehicle Speed Sensor (VSS) Malfunction
This code points to an issue with the vehicle speed sensor, which can affect speedometer readings and transmission shifting.
P0171: System Too Lean (Bank 1)
This code means that the air-fuel mixture is too lean in Bank 1, which can be caused by vacuum leaks, a faulty MAF sensor, or fuel delivery problems.
P0174: System Too Lean (Bank 2)
Similar to P0171, this code indicates a lean air-fuel mixture in Bank 2, potentially due to vacuum leaks, a malfunctioning MAF sensor, or issues with the fuel system.
P0440: Evaporative Emission Control System Malfunction
This code suggests a problem with the EVAP system, which could be due to a loose or faulty gas cap, or a leak in the EVAP system.
P0455: Evaporative Emission Control System Leak Detected (Gross Leak/No Flow)
This code indicates a large leak in the EVAP system, often caused by a loose gas cap, damaged hoses, or a faulty purge valve.
P0128: Coolant Thermostat (Coolant Temperature Below Thermostat Regulating Temperature)
This code means that the engine coolant temperature is lower than expected, possibly due to a stuck-open thermostat or a faulty coolant temperature sensor.
P0335: Crankshaft Position Sensor A Circuit Malfunction
This code points to an issue with the crankshaft position sensor, which can cause starting problems, engine stalling, and poor performance.
P0340: Camshaft Position Sensor Circuit Malfunction
This code indicates a problem with the camshaft position sensor, leading to engine misfires, stalling, and reduced fuel efficiency.
P0705: Transmission Range Sensor Circuit Malfunction (PRNDL Input)
This code suggests an issue with the transmission range sensor, affecting the vehicle's ability to correctly detect gear positions.
P0740: Torque Converter Clutch Circuit Malfunction
This code means there is a problem with the torque converter clutch circuit, which can result in poor fuel economy and transmission performance issues.
P0745: Pressure Control Solenoid Malfunction
This code indicates a problem with the pressure control solenoid in the transmission, leading to shifting problems and transmission slippage.
P1135: Heated Oxygen Sensor (HO2S) Insufficient Switching (Bank 1, Sensor 1)
This code points to an issue with the heated oxygen sensor in Bank 1, which can affect fuel efficiency and emissions.
P1165: Swirl Control Valve Control Vacuum Check Switch
This code indicates a malfunction in the swirl control valve, which can impact engine performance and fuel efficiency.
P1148: Closed Loop Control (Bank 1) - Incorrect Voltage
This code suggests a problem with the closed-loop fuel control in Bank 1, potentially caused by issues with the oxygen sensors or fuel system.
Erase Infiniti Fault Codes
Step 1: Ensure the Problem is Resolved
Before erasing fault codes, it is crucial to ensure that the underlying issue has been addressed.
Clearing codes without fixing the problem can lead to recurring issues and potentially damage your vehicle.
Step 2: Access the "Erase Codes" Function
Navigate to the "Erase Codes" or "Clear Codes" function on your OBD2 scanner.
Confirm that you want to erase the codes. This action resets the vehicle's computer and turns off the "Check Engine" light if the problem has been resolved.
The process of erasing codes is generally simple, but it is essential to follow the scanner's instructions precisely to avoid any errors.
Some advanced scanners may offer additional features, such as performing a readiness check to ensure all systems are functioning correctly after clearing the codes.
Step 3: Verify the Erase
After clearing the codes, it is good practice to turn off the ignition and then turn it back on to verify that the "Check Engine" light remains off.
If the light comes back on, it indicates that the issue persists and needs further diagnosis. Verifying the erase is a crucial step to ensure that the problem has been effectively resolved.
If the "Check Engine" light reappears, it may be necessary to perform further diagnostics and repairs to address any remaining issues.
Continuously monitoring the vehicle's performance and rechecking for fault codes can help ensure long-term reliability and functionality.
Tips for Using an OBD2 Scanner
Live Data
Advanced OBD-II scanners provide live data that shows real-time information from your vehicle's sensors. Understanding this data can give you deeper insights into your vehicle's performance and help you diagnose issues more accurately.
Live data can include information such as engine RPM, vehicle speed, fuel trim levels, and sensor voltages.
By analyzing this data, you can identify anomalies and trends that may indicate underlying problems, allowing for more precise diagnostics and targeted repairs.
Keep Software Updated
Ensure your OBD2 scanner's software is up to date. Manufacturers frequently release updates that include new codes and improved diagnostics, ensuring your scanner remains accurate and effective.
Regularly updating the scanner's software can also provide access to new features and enhancements, making the tool more versatile and efficient.
Staying current with software updates ensures compatibility with the latest vehicle models and systems, enhancing the scanner's overall performance and reliability.
Conclusion
Using an OBD2 scanner to read and erase fault codes in your Infiniti is a straightforward process that can save you time and money.
By understanding how to use this powerful tool, you can diagnose and address issues promptly, keeping your vehicle running smoothly.
Regular scanning and maintenance can also help prevent unexpected breakdowns and ensure your Infiniti remains in top condition.
FAQs
What should I do if my OBD-II scanner displays a code not listed in the manual?
If your OBD-II scanner displays a code not listed in the manual, you can look up the code online using reputable automotive websites or forums. Additionally, contacting your vehicle manufacturer or a professional mechanic can provide further guidance.
Can clearing fault codes with an OBD-II scanner void my car's warranty?
Clearing fault codes with an OBD-II scanner typically does not void a car's warranty. However, it is essential to address the underlying issues causing the codes. Failing to do so can lead to more significant problems that may affect warranty coverage.
What are some signs that my Infiniti's OBD-II port might be malfunctioning?
igns of a malfunctioning OBD-II port include the scanner failing to connect or communicate with the vehicle, intermittent connection issues, or the scanner displaying error messages. If you experience these issues, inspect the port for damage or consult a professional.
Recommended Similar Articles:
- Reprogram your car computer and improve your vehicle's performance at an affordable price
- How to Detect EVAP Leaks with Auto Smoke Test
- Easily identify and repair your car's evaporative emission system leak for a smoother drive
- Fuel Injector Machine Cleaning: Steps for the Best Results
- Should I Get an OBD2 Scanner for Cars? The Value is Hard to Ignore!


